In this we will learn how to create a video calling app using react js & node js. Creating a video calling app involves several steps and technologies. Here is a simplified outline of the process:
Define Requirements:
- List down the features you want in your video calling app, such as one-on-one video calls, group calls, chat, file sharing, etc.
- Decide on the platform (iOS, Android, web) for your app.
Choose Technology Stack:
Decide on the technology stack for development. Common choices include:
- Frontend: React Native for cross-platform or native development for iOS (Swift) and Android (Kotlin/Java).
- Backend: Node.js, Python (Django or Flask), Ruby on Rails, or other backend frameworks.
- Real-time communication: WebRTC is commonly used for real-time video communication.
Remember to adapt the development process based on the specific requirements of your video calling app and the technology stack you choose. Additionally, consider consulting with legal professionals to ensure your app complies with all applicable laws and regulations.
In this post we will using the web platform video calling app using ReactJs and Node js tech stack.
Prerequisites:
Knowledge of React: Familiarize yourself with React.js for building the frontend of your application. Understand the basics of React components, state management, and lifecycle methods.
Node.js and npm: Install Node.js and npm (Node Package Manager) on your development machine. Node.js will be used to run your backend server.
WebRTC: Learn about WebRTC, a free, open-source project that provides web browsers and mobile applications with real-time communication via simple application programming interfaces (APIs). Understand the basics of peer-to-peer connections, media streams, and signaling.
Express.js (or another Node.js framework): Choose and set up a backend framework. Express.js is a popular choice for building APIs with Node.js.
Socket.IO (or another real-time communication library): For real-time communication between the client and the server, consider using Socket.IO or a similar library.
Steps to create video calling App:
Breaking down an application into two main sections, Backend and Frontend, is a common and effective approach in software development. Let’s start by outlining the steps for creating the Backend part of the application:
Initialize Node.js Project:
mkdir video-call-app
cd video-call-app
npm init -y
Install Dependencies:
We have to install all the dependencies including socket.io
npm install express socket.ioCreate the Backend (server.js):
When using the Express framework for Node.js, you typically create a server file to initialize and configure your Express application. The common convention is to name this file server.js or app.js, though the choice ultimately depends on your project preferences. Here’s an example of how you might structure your server.js file:
const express = require('express');
const http = require('http');
const socketIO = require('socket.io');
const app = express();
const server = http.createServer(app);
const io = socketIO(server);
app.get('/', (req, res) => {
res.send('Server is running');
});
io.on('connection', (socket) => {
console.log('A user connected');
socket.on('disconnect', () => {
console.log('User disconnected');
});
});
const PORT = process.env.PORT || 5000;
server.listen(PORT, () => {
console.log(`Server is running on port ${PORT}`);
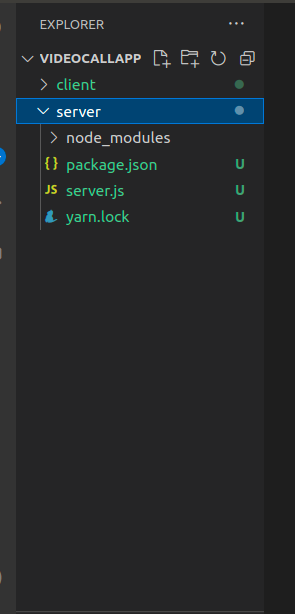
});Here’s an example of how you might structure your directory for a basic video calling app using Express:
Now we have to create the frontend(React js).
Generate React App:
npx create-react-app client
cd client
Install Dependencies for Frontend:
npm install socket.io-clientUpdate src/App.js for Frontend:
import React, { useEffect } from 'react';
import io from 'socket.io-client';

const socket = io('http://localhost:5000'); // Replace with your server URL

function App() {
  useEffect(() => {
    socket.on('connect', () => {
      console.log('Connected to server');
    });

    socket.on('disconnect', () => {
      console.log('Disconnected from server');
    });

    return () => {
      socket.disconnect();
    };
  }, []);

  return (
    <div className="App">
      <h1>Video Calling App</h1>
      {/* Add your video call components here */}
    </div>
  );
}

export default App;
Now we have created our React app. Directory structure as below:

Implement Video Calling Functionality:
For video calling functionality, you would need to implement WebRTC. You can use a library like simple-peer to simplify the process. Install it in your React app:
cd client
npm install simple-peer
Then, update your src/App.js file to include video calling functionality:
import React, { useEffect, useRef } from 'react';
import io from 'socket.io-client';
import SimplePeer from 'simple-peer';

const socket = io('http://localhost:5000');

function App() {
  const videoRef = useRef();

  useEffect(() => {
    socket.on('connect', () => {
      console.log('Connected to server');
    });

    socket.on('disconnect', () => {
      console.log('Disconnected from server');
    });

    const peer = new SimplePeer({ initiator: true, trickle: false });

    navigator.mediaDevices.getUserMedia({ video: true, audio: true })
      .then((stream) => {
        // Display local video
        videoRef.current.srcObject = stream;

        // Send the local stream to the peer
        peer.addStream(stream);

        // Listen for data from the peer
        peer.on('data', (data) => {
          console.log('Received data:', data);
        });

        // Connect to the peer
        peer.on('signal', (data) => {
          socket.emit('signal', data);
        });

        // Listen for incoming signals
        socket.on('signal', (data) => {
          peer.signal(data);
        });
      })
      .catch((error) => {
        console.error('Error accessing media devices:', error);
      });

    return () => {
      socket.disconnect();
      peer.destroy();
    };
  }, []);

  return (
    <div className="App">
      <h1>Video Calling App</h1>
      <video ref={videoRef} autoPlay playsInline></video>
    </div>
  );
}

export default App;
This example assumes a simple one-to-one video call scenario. You can expand on this foundation to handle multiple participants, improve user interfaces, and add additional features as needed.
All the code creation done. Now we have to run both the server’s(backend & fronend)
In the video-call-app directory (for the backend):
node server.jsIn the client directory (for the frontend):
npm startYou can check the integration on http://localhost:3000
You can get complete code on build-a-video-calling-app-using-react-nodejs.